|
Preparation and Materials
Building a picnic
table is a sizable project, so it's best to work outdoors. Make
sure you have plenty of room, access to power outlets and a couple
of sawhorses handy.
This project
requires using some power tools. Always wear safety glasses and
ear protection when running them.
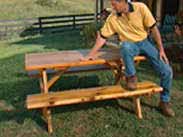
Cedar is a good
choice for outdoor furniture because its high oil content helps
it outlast even many hardwoods when exposed to the elements. Cedar
also has an attractive natural color and a distinctive grain that
looks good even without stain (figure A).
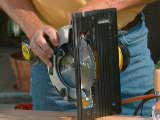
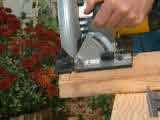
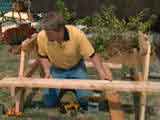
Cedar is easy to cut, so you can use a hand saw, but a circular
saw will make the job go much faster. When using a circular saw,
you can adjust the depth of the cut (figure B). The proper depth
allows about 1/2" of the blade to extend below the bottom of
the board being cut, which prevents the blade from binding and overheating.

Cutting the Pieces
The first steps
in building a picnic table are to cut and then assemble the pieces
for the sides. A desirable height for a dining table is 30".
But because the legs of the table will be set at a 22-degree angle,
they'll need to be longer than the table's height. At their longest
point the legs will be 33", with both ends also cut at a 22-degree
angle to make the tabletop parallel to the ground.
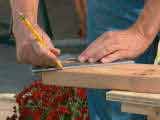
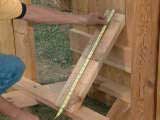
Use a combination
square (figure C) to measure and mark a 22-degree angle for making
the first cut on the table legs. Once you've drawn the first angle,
you can use an adjustable square to measure and mark the rest of
the angled cuts. Use a circular saw to cut along the measured angles
(figure D).
The next components are the horizontal side braces. One set will
support the tabletop and another the seats (figure E).
The top braces will be 26 1/2" in length--long enough to support
five 2" by 6" boards butted together to form the top (figure
F). Trim the corners of the top braces to prevent snagging when
people sit down.
The seat braces are 2" by 4" boards cut the width of the
tabletop (27 1/2") plus about a foot for each seat, for a total
of 53".
Assembling the Ends
Lay out the
top brace and seat brace, along with two of the angled legs, with
the legs set in 5" from the end of the top brace and the seat
brace set 15 1/2" from the ground. Secure the components with
2 1/2" galvanized decking screws (figure G).
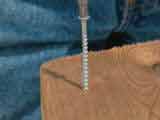
For greater stability, strengthen the table with 1/4" galvanized
bolts. At each joint, drill a hole completely through, using a 1/4"
drill bit. Insert a 3 1/2"-long 1/4" galvanized carriage
bolt into the hole, and tap it in place with a hammer. Install a
galvanized washer and nut on the end of the bolt, and tighten with
a wrench.
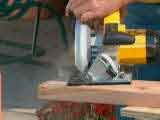
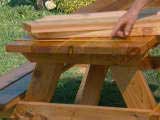
Once you've assembled both ends, put together the top. The top and
seats are all 60" long. Five boards form the tabletop; four
form the two seats. Lay out the 2" by 6" boards, selecting
the best surfaces to form the top of the table. Mark and square
off the rough ends of the boards with a circular saw (figure H ),
then cut each board to a length of 60".
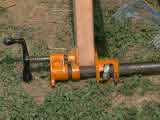
Begin attaching the tabletop and seat boards to the two ends. To
make the job easier, use pipe clamps to hold the end assemblies
upright and perpendicular to the ground (figure I).With
both ends held upright, place the first seat board (figure J), making
sure that it's flush with the outside of each brace and with an
overhang that is equal on both ends. Secure the seat boards to the
seat support with 2 1/2" decking screws. Use two screws per
board.
Assembling the Top
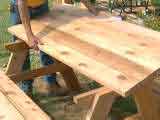
You may find
it best to assemble the tabletop as a unit so that it's easier to
position with the end pieces (figure K). Place the boards with their
better side down. If you plan to finish the table, you may prefer
to position the boards with no gaps between them, particularly since
cedar is a well-dried and stable wood. If you'll leave the table
unfinished or are using another wood, such as pine, it's advisable
to leave 1/4" to 1/2" gaps between boards.
Underneath the
top pieces, position two 26"-long 2" by 6" braces
to provide additional stability for the top boards. Before attaching
the two braces, make certain the top is square, using a carpenter's
square. Place the braces about 12" from the ends. (If you're
using thinner wood, consider adding a third brace centered between
the other two.) Position the braces, and attach them to the top
boards with galvanized decking screws.
Once you've attached the braces, flip the top over, and position
it on the end pieces. Attach the top to the end pieces with galvanized
screws.
The table may be wobbly even after you attach the top and end pieces.
To stabilize it, attach diagonal braces from the middle of the seat
brace up to the underside of the table. Measure the distance (figure
L), and cut a 45-degree angle on each end of the braces. (On this
table, the braces will be 23 1/2" long.) Attach the diagonal
brace to the seat brace and the underside of the table with galvanized
screws.
Sanding and Finishing
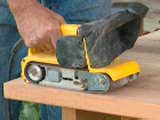
Use a belt sander
with medium-grit sandpaper to smooth out rough spots and bring out
the wood's grain. Keep the belt sander flat on the wood (figure
M), and sand in the direction of the grain, always maintaining a
firm grip on the sander. Remove any scars or marks in the finish
with a palm sander.
Don't bother staining the table: its color would quickly be bleached
out by sun exposure. Instead, use a spar varnish -- a tough finish
designed specifically for wood that's exposed to the elements. Apply
spar varnish with a natural- or synthetic-bristle brush, working
it well into the wood. After applying the varnish, hold the brush
at a 45-degree angle, and pull it slowly across the wood to break
up any bubbles. Let the varnish dry overnight, then apply a second
coat.
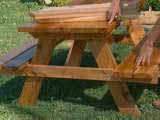
A picnic table
made this way will hold up well under strenuous use and will last
for years.
|


 2"
x 4" cedar lumber
2"
x 4" cedar lumber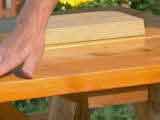 Carpenter's
square
Carpenter's
square