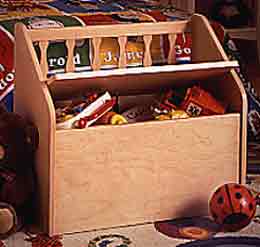
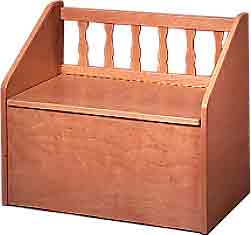
This little chest,
which can hold a bunch of easily accessible toys, turns into a convenient
bench when the top is closed. And the lid is controlled by a spring-tensioned
support that prevents accidental slamming on little fingers.
Next, rip and
crosscut maple edge banding and glue it to the panels (Photo 2).
We used 3-way clamps, but you can try bar clamps or even masking
tape. Note that the top edge bands of the end panels are slightly
long, so they'll be sawn at an angle when the ends are cut to shape.
Also, use three 19-gauge brads partially driven into each edge band
to keep it from sliding. Band all the panels in this fashion --
except the lid, which gets its edge bands after the chest is assembled.
After the glue
dries, scrape off glue beads and plane edge bands flush to the panel
surfaces.
Next, set the
table saw miter gauge to 35 degrees and make the angled cuts on
the end panels (Photo 3). Glue and clamp the edge bands onto the
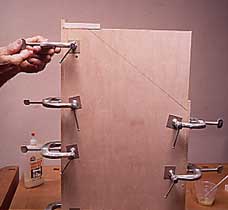
sawn surface. We cut the panel dadoes and grooves with a router
and a 1/2-in.-dia. straight bit. A rectangular frame is used to
guide the router to make these cuts (Photo 4). Be sure that the
side rails are parallel and are spaced to fit the diameter of your
router base, plus the difference between the diameter of the router
bit and the width of the required dado or groove. You must precisely
measure the thickness of the plywood before setting the distance
between the rails. (Hardwood plywood is always slightly thinner
than its stated dimension.) Tack nail a movable stop across the
rails to control the length of the cut, and cut each groove or dado
in two passes. Then, using a chisel, cut the ends of the grooves
square.
Making The
Splat Rail And Assembly
Cut the splats
to shape, then smooth their edges. The pieces will be too small
to clamp to a bench. Instead, use a 1/16-in.-radius corner-rounding
bit in the router table for the job (Photo 5).
With the dado
head in the table saw, cut the groove in the top rail and the edge
band on the back panel. Then cut the filler blocks to length, leaving
the four end blocks 1/2 in. longer than the others. Remember to
round off the rail edges before assembling the workpieces.
Use glue sparingly
as you fit the splats and filler blocks in the top rail (Photo 6).
When they're all in place, briefly insert the subassembly into the
groove in the back panel -- without glue. After the glue in the
top rail has set, repeat the procedure, applying glue and spacing
each block to secure the splats in the back panel. During both subassembly
stages, temporarily test fit the back to the side panels to ensure
later realignment.
When the back
assembly is dry, complete the project in the following sequence:
Insert the back panel into the groove (Photo 7). Join the bottom
and front to this subassembly, then add the second end and lay the
chest on its back. Next, glue and clamp the entire assembly together
(Photo 8) and check it for square.
Cut the lid
panel to size, glue and clamp the side bands to it and then add
the front and back bands. Install the hinge and lid support, attach
the standoffs and relieve any sharp corners with fine sandpaper.
Finally, apply several coats of polyurethane to finish off the project.
|
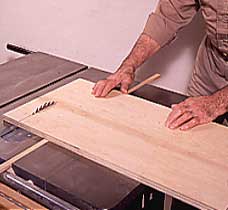
1--Tack nail
a strip to the back of each panel. The strip should ride in the
miter gauge groove as the panel is being cut.
2--Glue and
clamp each of the edge bands to the panels. Note that the top
edge band of the end panel is just slightly long.
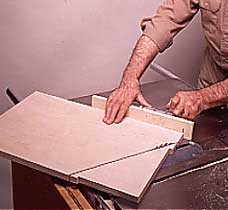
3--Using the
miter gauge, cut the sloping edge on the end panels. Afterward,
apply edge banding to the sawn surface.
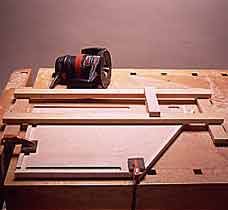
4--Cut grooves
and dadoes in the end panels with a router. Then tack nail a block
across the rails to stop the cut.
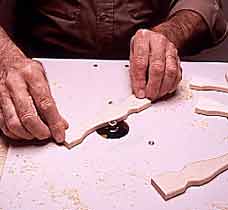
5--Since the
splats are so small, it's best to round over their edges on a
router table. A ball-bearing bit usually works best.
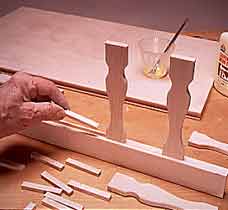
6--Insert
the splats and spacer blocks in the top rail. After the glue has
dried, repeat the procedure on the back panel.

7--Begin the
assembly by inserting the back into an end panel. Next, add the
bottom and front, then the other end.
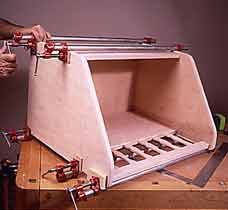
8--Clamp the
chest using five bar or pipe clamps. Be sure to check the assembly
for square before allowing the glue to set.
|